We’ve just arrived to our new home and the need to nest is real. After years of living on concrete, I am ready to finally have my hands in dirt and to execute some of my dreams. However our back-to-the-earth plans will be somewhat different than many homesteaders because, unlike many in the community, we are renting.

We entertained the idea of buying immediately but decided to rent for a while due to the need to save for a down payment and other real estate costs. California is not known for affordability and our area has a critical shortage of housing, which drives prices even higher than many comparable places.
Buying our own home will take planning and time. While this will change our plans for self-sufficiency, it will not eliminate them. In fact, a lot of people are able to make their homesteading dreams happen before they actually own the homestead.
Renting can change plans in a lot of ways. Many homeowners are reluctant to all tenants to make any long-lasting changes to the home and property, even simple ones that increase home value like a fresh coat of paint. In addition, many landlords don’t allow animals, although our landlord is surprisingly cool about our furry beasts. Last, as a renter you should only spend significant money on projects you can take with you when you leave.
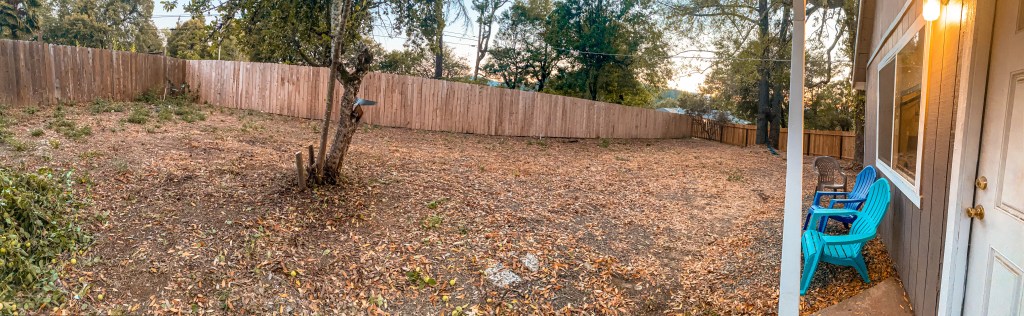
That said, I have so many plans for my rental. Our property is heavily wooded except for a large fenced yard. Our landlord does not care what we do to this yard – in fact it was filled with weeds and the occasional shard of broken glass when we arrived. Anything is an improvement! Here are our plans for building an affordable, sustainable, and landlord-friendly homestead.
Step 1: general clean up
We have already done a lot of trimming, weeding, and general pick-up but there is still plenty to be done. I anticipate this could take a few more days if we’re motivated. Keep in mind that my timeline includes working full time!
This short clean-up period will make our home a generally safer and nicer place to live. It also gives the homesteading renter an opportunity to assess the resources available on the land. For example, we have two large piles of scrap wood from prior home projects which we will use as appropriate in different yard projects, then chop the rest into kindling for winter heat. We also have a large crab apple tree and a decent patch of blackberry bushes that will provide lots of low-effort free food.
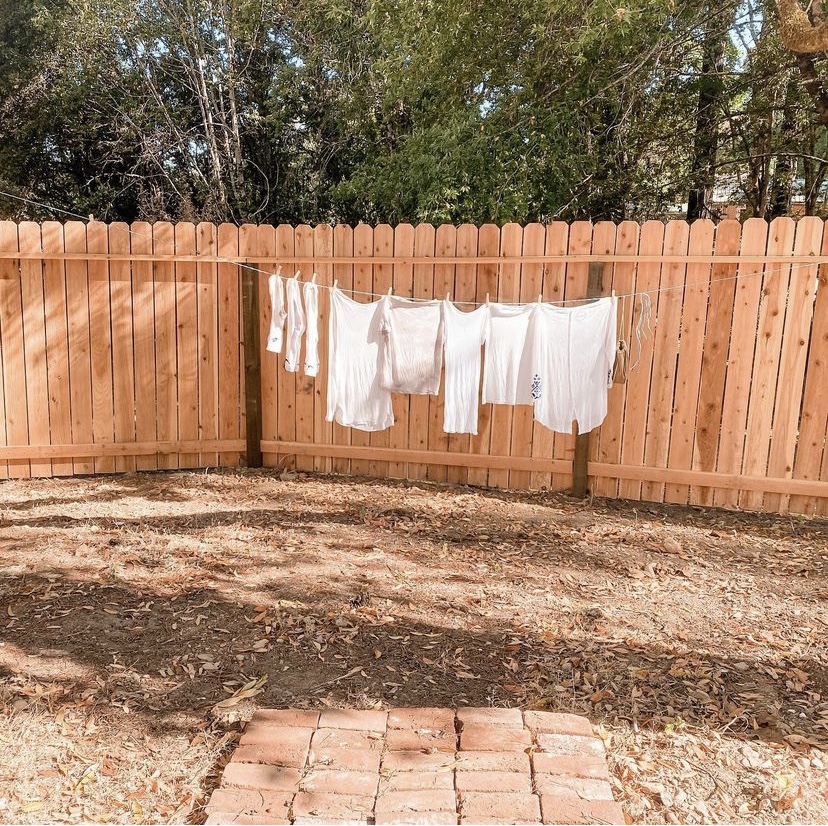
Step 2: hang a laundry line
As seen here, we already have hung a simple rope for drying laundry. In the longer term we will need a sturdier system with more hanging space. We will probably install an umbrella style laundry line in this area, which is sunny and bright most of the day.
Although I plan to have a clothing dryer in the near future, we live in an area where electricity is very expensive. Hanging laundry when possible makes sense for both financial and environmental reasons. In addition, I find it cathartic to spend a few minutes outside hanging or taking down clothing. The smell of laundry dried in clean country air can’t be beat.
Step 3: begin raising food in a container garden
We have always kept some kind of container garden, even in our tiny fourth floor Seattle apartment. This is a low effort way to supplement your groceries – so important in a rural area without affordable groceries close by – and is easy to move to a new home if needed. We plan to start with an herb garden on sunny windowsills and add some edible flowers, arugula, and other greens on the shady front porch.
Step 4: install a compost bin
Thanks to a leftover disposal system I like to call “many young adults in the home,” we have little food waste compared to the average first world household. However, we still have occasional scraps and peels. Until we have chickens to help out, I will use our food scraps to create rich soil for our garden.
Because we have a sizable yard and a just-as-sizable family, I plan to build a huge composting bin in one of the corners of the yard, enclosed by the scrap wood that our landlord left behind. We also may dabble in vermiculture, buying worms to help turn our food into rich soil more quickly.
If you do not want to dedicate so much space, there are many small composters on the market. Many of these are movable, which is ideal for renters. These are a great option for people who want to start slow and do not need as much soil.
Step 5: build garden beds
Raised garden beds are an ideal option for yards like mine with lots of weeds – and do we have the wood for them! If our landlord was reticent or if the wood was not free and plentiful, I would probably try my hand with planting in simple tilled soil.
I am hoping to fit four or five raised beds along the fence, enough to grow a lot of our produce – especially combined with a container garden. We will fill the garden beds with soil from our composting project. Because this process will be an undertaking and require some time, our late summer and fall garden will be in containers this year.
Step 6: plan an outdoor living area
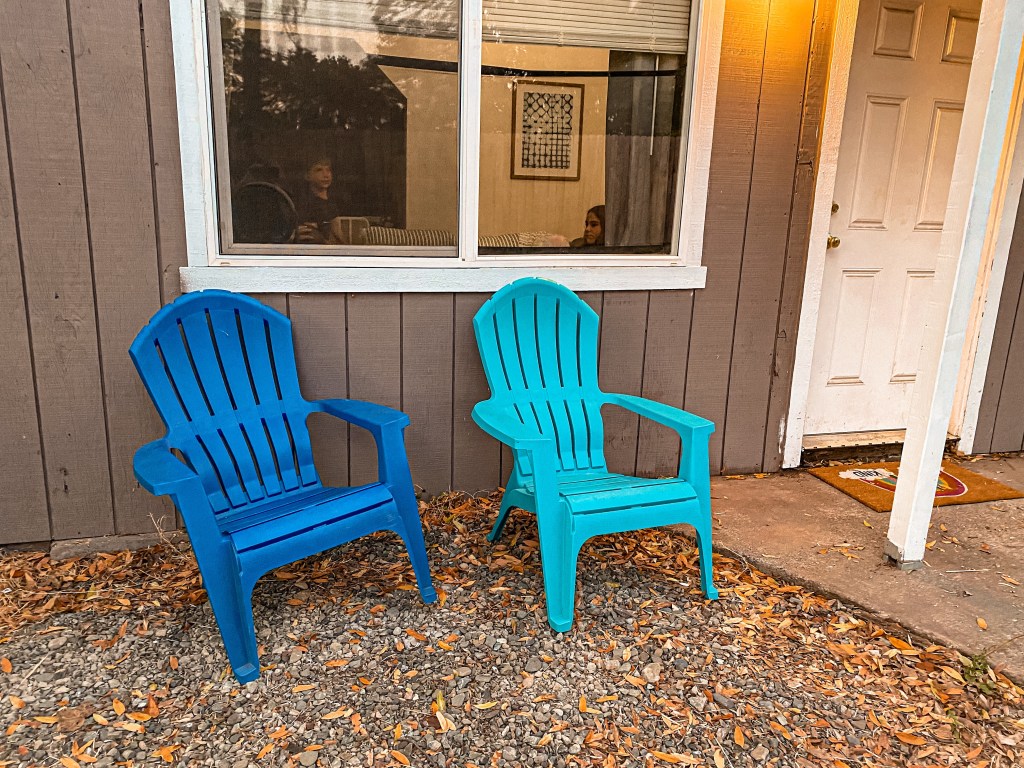
We have a side door that opens from the living room to the fenced section of the yard. Unfortunately it opens to a minuscule paved and covered area, barely enough to shake off your boots. After all of this planning and work, I would like to enjoy my beautiful backyard. Clearly someone else used this area in a similar way, because it is covered with gravel.
We are thinking about creating a “floor” with bricks or other paving materials set into sand, with a sail strung up to provide shade. Add some fairy lights and we will have a lovely entertaining space! These are low cost, removable, and can make the area into a functional outdoor living room. I am already watching for patio furniture and a fire pit to upgrade the whole experience.
Step 7: add whimsical spaces

As a born and bred hippie, I am so pleased to have the space for a little enlightenment and meditation. A zen garden made of local rocks set into raked sand will provide the perfect area to meditate or just to enjoy the beautiful coastal California weather.
If you are not into Eastern philosophy, you could also put in a flower garden, a fountain, or another feature to beautify your yard. Be sure to consider your water usage and how much time you want to spend maintaining the area when making plans. We also hope to plant some wildflower seed along the fence to add more visual interest without requiring watering or upkeep.
Step 8: consider a chicken coop
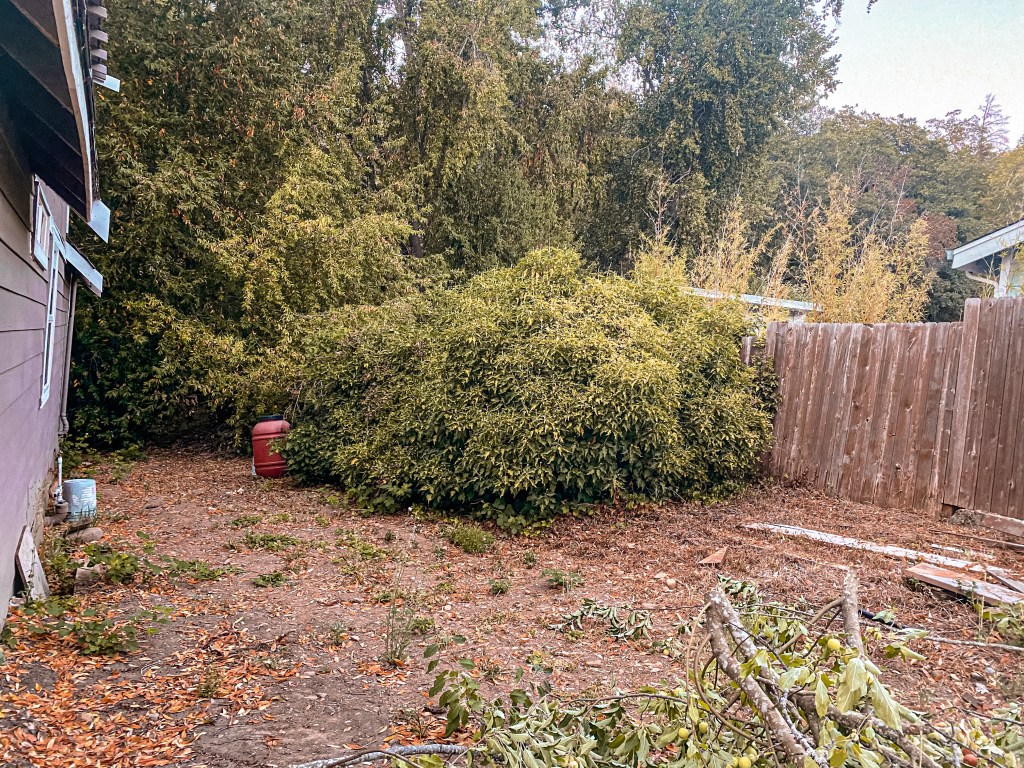
Is it really a homestead without chickens? Although we have no intentions to butcher, we could use a cheaper source of local free range eggs. As you can seen the area behind our house is quite frankly a deplorable mess. Once we have moved all of the scrap wood, branches, and random home debris, we’ll have the perfect area for a little chicken coop with enclosed yard. We plan to let them roam the larger yard during the day and return to their safe, fully enclosed space in the evening when predators come out.
Originally I planned to build their house out of scrap wood, but I have since discovered that the wood is not in great condition after who-knows-how-many seasons outside. We will either build or buy a structure that we can move with us when we finally purchase a home.
The future holds so many plans – and so much work for this family over the coming months! However these are all fun projects that will allow us to get the maximum enjoyment out of our rural rental without making expensive or permanent changes to someone else’s property. Keep reading to find out more about how we execute our plans and what we learn along the way.
